Somehow, Father’s Day ended up being maintenance day around the house, but since it was my day, I decided to prioritize a little maintenance on the gear before I took on the yard. One of my primary pieces of gear is my CamelBak® hydration pack, which provides the family with water, snacks, and usually a lunch on our hikes. This pack is admittedly overkill for light use, but it came with a prior job assignment so the price was right and unlike a nylon daypack, I don’t have to worry about wear and tear. I thought I’d snap some pictures while I cleaned the hydration bladder, so that you could all participate in a little maintenance with me!
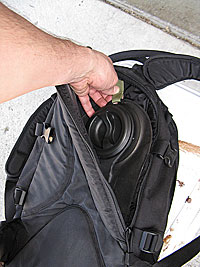
 If you are looking for a hydration pack, make sure you get one that provides access to the hydration bladder from the outside of the pack, so that you do not have to empty the pack to access it. On the CamelBak, you just unzip the hydration compartment and unhook the bladder.
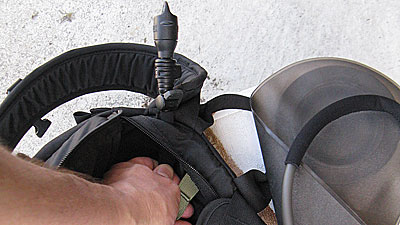
The hardest part about removing the hydration bladder from the pack is routing the drink tube through all its various clips, loops, and slots.

Every hydration pack I’ve ever seen provided slots for the hydration tube on both sides of the pack, and it’s an important feature to look for. I prefer to have it come over my left shoulder for no other reason than comfort and familiarity, but the option is there if I preferred the right and this is one of those things you won’t know until you use it for awhile.

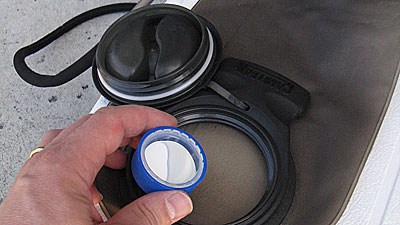
I use standard bleach to clean the hydration bladder. I add a few capfuls of bleach, then fill the bladder with water. It is important to drain some of the mixture out of the drinking tube to make sure it gets into that part of the system, too. I then let it sit for several hours.
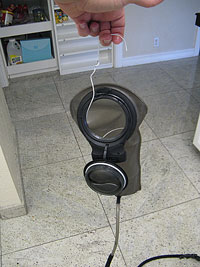
 Once I’m ready to rinse the hydration bladder, I dump the bleach solution out of the bag and refill with clean water. As before, I drain some of the water out the drinking tube to flush the bleach from it. I will repeat this process, with clean water, about four times to get the bleach smell completely out. Once I’m satisfied with the smell, it’s time to hang the bladder for drying. I have a coat hanger that I’ve bent into the shape of a coil spring in order to keep the bladder expanded while it hangs.
I have been very satisfied with using bleach to clean the hydration bladder, but there are other options out there. CamelBak makes tablets that dissolve in water, similar to denture cleaning tablets. Some people use baking soda, also. I can’t speak to the efficacy of these other solutions, but if the bleach turns you off, they are certainly worth considering.
See also…

Have you seen the new Geigerrig hydration packs that turn inside out and go in your dishwasher? No more bleach, baking soda, hangers, wire frames…
The spiraled wire hanger is a perfect solution to the issue of how to get the bladder really dry – great tip! I’m going to go mutilate a wire hanger…
Another method for getting it totally dry involves propping it open and hanging upside-down with a paper towel hanging from the top through the open lid to act as a wick and speed evaporation. Another clever suggestion for cleaning that I saw recently was using a (dedicated) long-handled foam paint brush to clean the inside of the reservoir, since the narrow angled tip can easily scrub along seams.
I’ve seen a number of cleaning methods that involve different solutions – though bleach IS unquestionably one of the most fail-safe options.
Other things people use to clean bladders:
-cleaning kit tablets – effective but expensive
-baking soda solutions, especially for odors and removing plastic or bleach flavors, for which a 30-minute soak with 2 tsp should be adequate
-vinegar solutions, which are commonly used in food service for disinfecting surfaces, again about 2 tsp should be enough
-denture cleaning tablets, e.g. Efferdent, and you may want to avoid the mint-flavored ones
-foaming solutions of baking soda with vinegar or lemon/lime juice, though I’m not sure this is the best idea
I think I am going to try some baking soda next time – that is a great idea, Andrea!
Bleach – crikey! I always use a Baby Sterilising Fluid, best known in Britain being Milton although you can get many much cheaper brands. If it’s safe to sterilise baby stuff then that’s good enough for me.
Haha! I’m not sure what we call that, here in the states. There is a good chance that your tap water is sterilized with bleach, though, so I wouldn’t worry too much.
Clark & Jane – a cap (at least on the 3qt jug) is 1/2 tablespoon. That’s a good point about diluting it first – maybe adding the bleach to a half-full bladder would be best, since adding the remaining water would still mix the solution thoroughly.
Clarke is right about the bleach. I’m a hobby beer brewer and sterilization is the most important step of that process. I was surprised when I began brewing how little bleach was needed. 1 Tbls per galon and wait 15 minutes. A cheap and effective sanitizer. STOP waiting hours. You’re allowing the bleach to migrate into the plastic. Overtime that means bleach flavored water–which won’t harm you in and of itself, but it will keep you from drinking the water which could lead to dehydration.
Also DILUTE BLEACH FIRST!! Over time you could damage the bladder by putting it into contact with full strength bleach. I know bleach containers are plastic and so is the bladder–but you’re not spending any extra time if you fill the bladder with water first then add the bleach.
Love the wire hanger trick! Thanks for sharing.
Jane Adair’s last blog post..Surprise Expense
Go easy on the bleach! 2-3 Tablespoons in a GALLON of water makes a powerful disinfectant.
Thanks, Roy. Love the spiral coat hanger tip!